Azure Registration Log
(Optional plugin, also required for using O365 accounts to send emails)
By using the Azure plugin, you can record access logs of Azure accounts.
To enable recording on the platform side, you need to register the application and authorize its access.
Log in to the Azure Portal (portal.azure.com) and click on Azure Active Directory.

In the left-hand menu, click on
And then, in the top menu, click on

When ready, click [Record].
You will arrive at the configuration page of the application you just created. In the left-hand menu, click on:
You will obtain:

By clicking [New Client Secret], you will obtain (on the right):
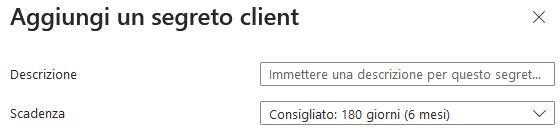
Specify a name and save.
Then, in the left-hand menu, click on
You will obtain:

Add a permission; on the right, you will obtain:

Click on Microsoft Graph

Select Application Permissions.
Search for auditlog in the search box, and you will obtain:

Finally, click on Add permissions.
⚠️ Attention: To enable sending emails through an Office 365 account, you must also add the Mail.Send authorization.
If you do not use the Azure plugin, you can limit authorization to email only !
Your permissions should now appear as follows:

Now click on Grant admin consent for …
You must be an administrator to grant this permission.
Next, you will need three pieces of data, available in the Overview section (left-hand menu):
You will obtain:

Make note of:
Application ID (Client)
Directory ID (Tenant)
In the “Certificates and secrets” section you can access the ClientSecret value

Copy the value from the Value column (using the dedicated icon).
⚠️ Attention: Copying the Client Secret Value is only possible immediately after creation.
Make sure to configure the settings and run a test before closing this window; otherwise, you will need to repeat the certificate generation.
In Configuration > Cloud (if enabled), you will find:

In this table, you can specify one or more Microsoft Azure tenants to access. By pressing [Ab], you can edit the rows:

In this table, you can manage the three fields required for operation.
By clicking [Test], you can verify their functionality.
Note: Remember that tenant access authorization expires every X months, and you will need to manually renew it in the Azure portal.
The expiration period is determined when the certificate is generated.
The Use Mail Account flag is used to designate this tenant as the sender account for the specified mailbox.
SHAREPOINT / ONEDRIVE
In case of log acquisition from SharePoint/OneDrive, the following points must also be activated:

Additionally, we recommend creating a new authorization (resulting in a new Client ID and Client Secret) with the following entries enabled for Microsoft O365 APIs:

In the Azure table, add:
